Although this is an easy step to do, it's a step that is a basis for a whole bunch of my – and perhaps in the future your Azure Logic Apps.
Since I've decided to blog about some Logic Apps that I've built as helper methods throughout the years, I've figured that it makes much more sense to extract this first step into a separate blog post, and link it in all the others (instead of copy pasting the whole thing into each blog post or completely ignoring it).
Get an Azure subscription
First of all, you're going to need an Azure subscription to get started :)
You can sign up for a free trial here.
Although you'll be asked for a credit card number, the only purpose of it at this moment is to prohibit misuse of free trials – so you can get only as many free trials as you have credit cards. Azure won't charge you a dime before you explicitly remove the spending limit, and thus allow Azure to charge your credit card after you spend the $200 of free credits, or they expire after a month.
Create an Azure Logic App
To create a Logic App follow the instructions here.
Stop following the instructions once you create a Blank Logic App and then return to this post.
Add the trigger
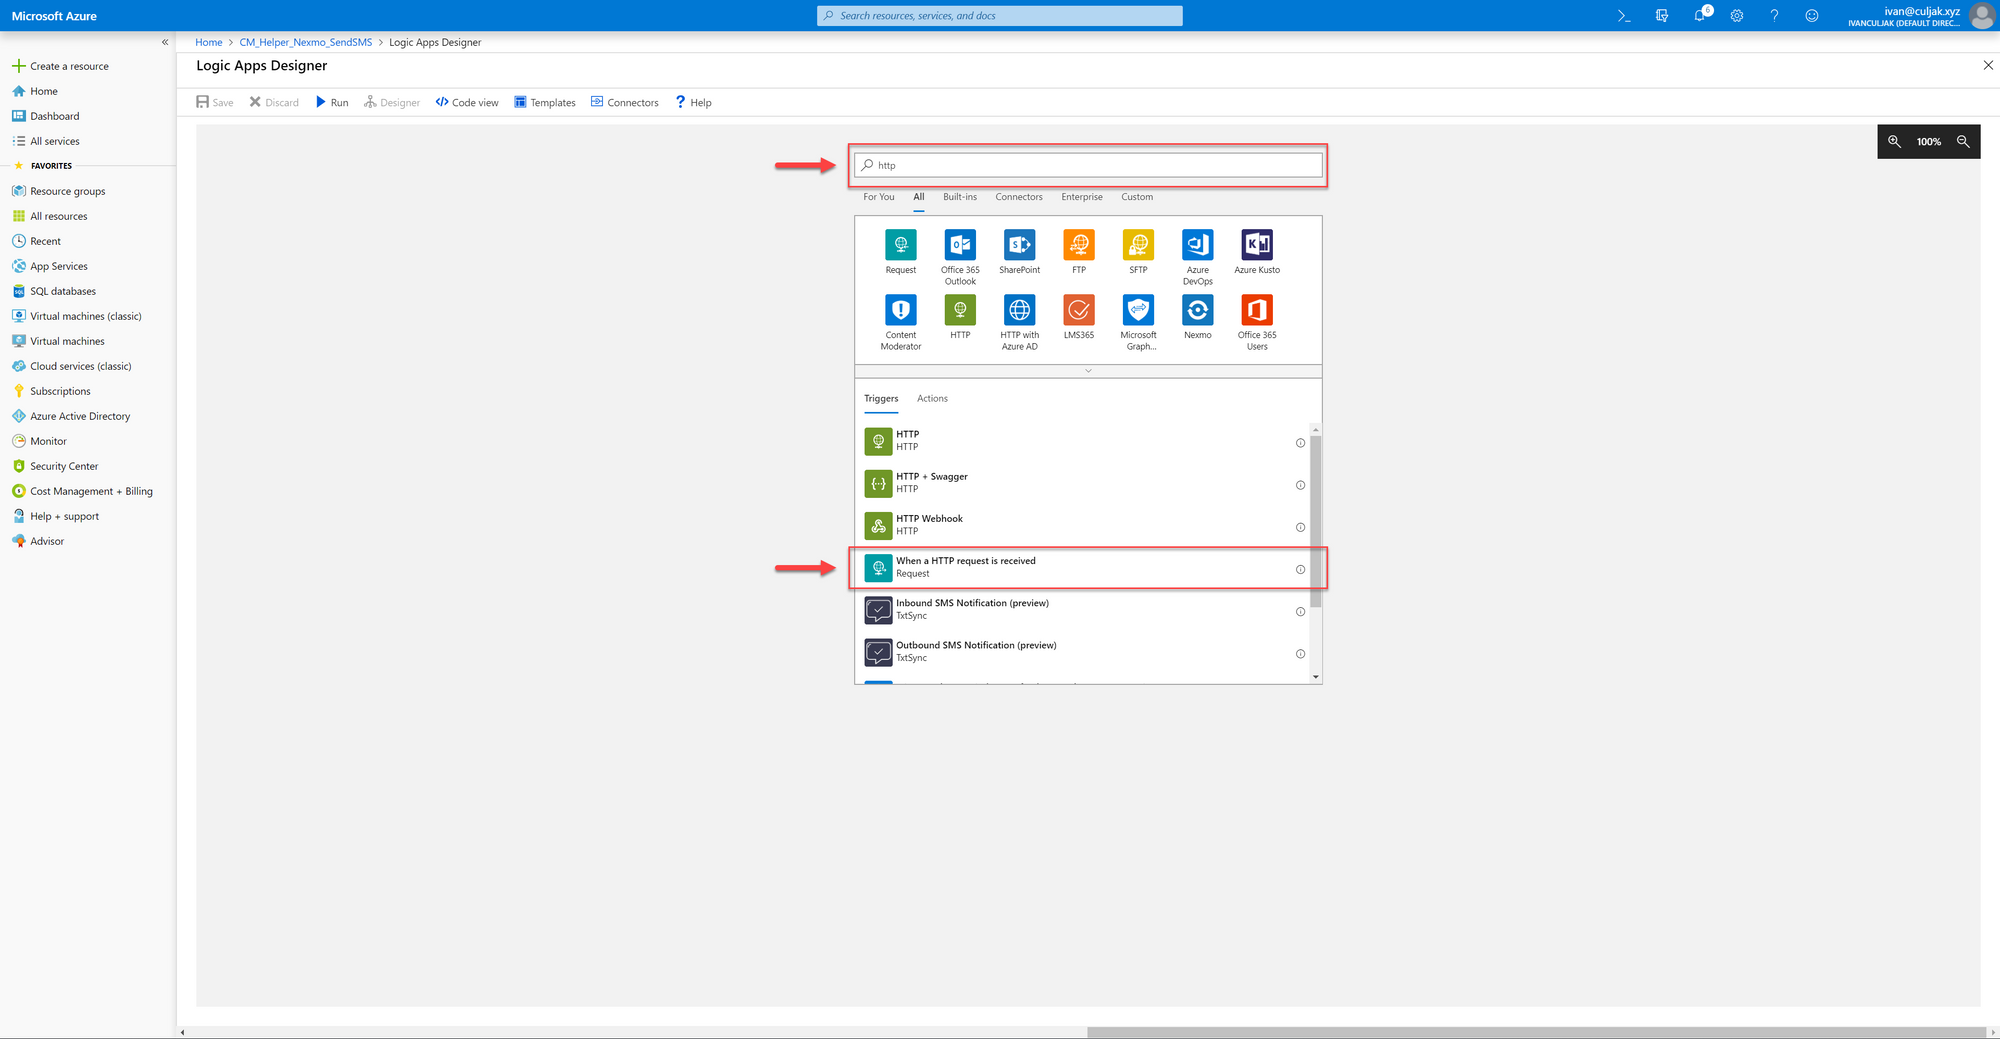
The first and only step that we're going to add in this specific blog post is a trigger, and it's called "When a HTTP request is received". So start typing "http" into the search bar at the top of the Logic Apps Designer gray canvas, and select the trigger which you want to use.

Define the JSON Schema
Once you add the trigger you'll be able to receive HTTP(S) POST requests, and since we'll want to get some data to figure out what the requester wants us to do, we'll try to fetch that data from the request body, and we'd like that payload to be JSON.
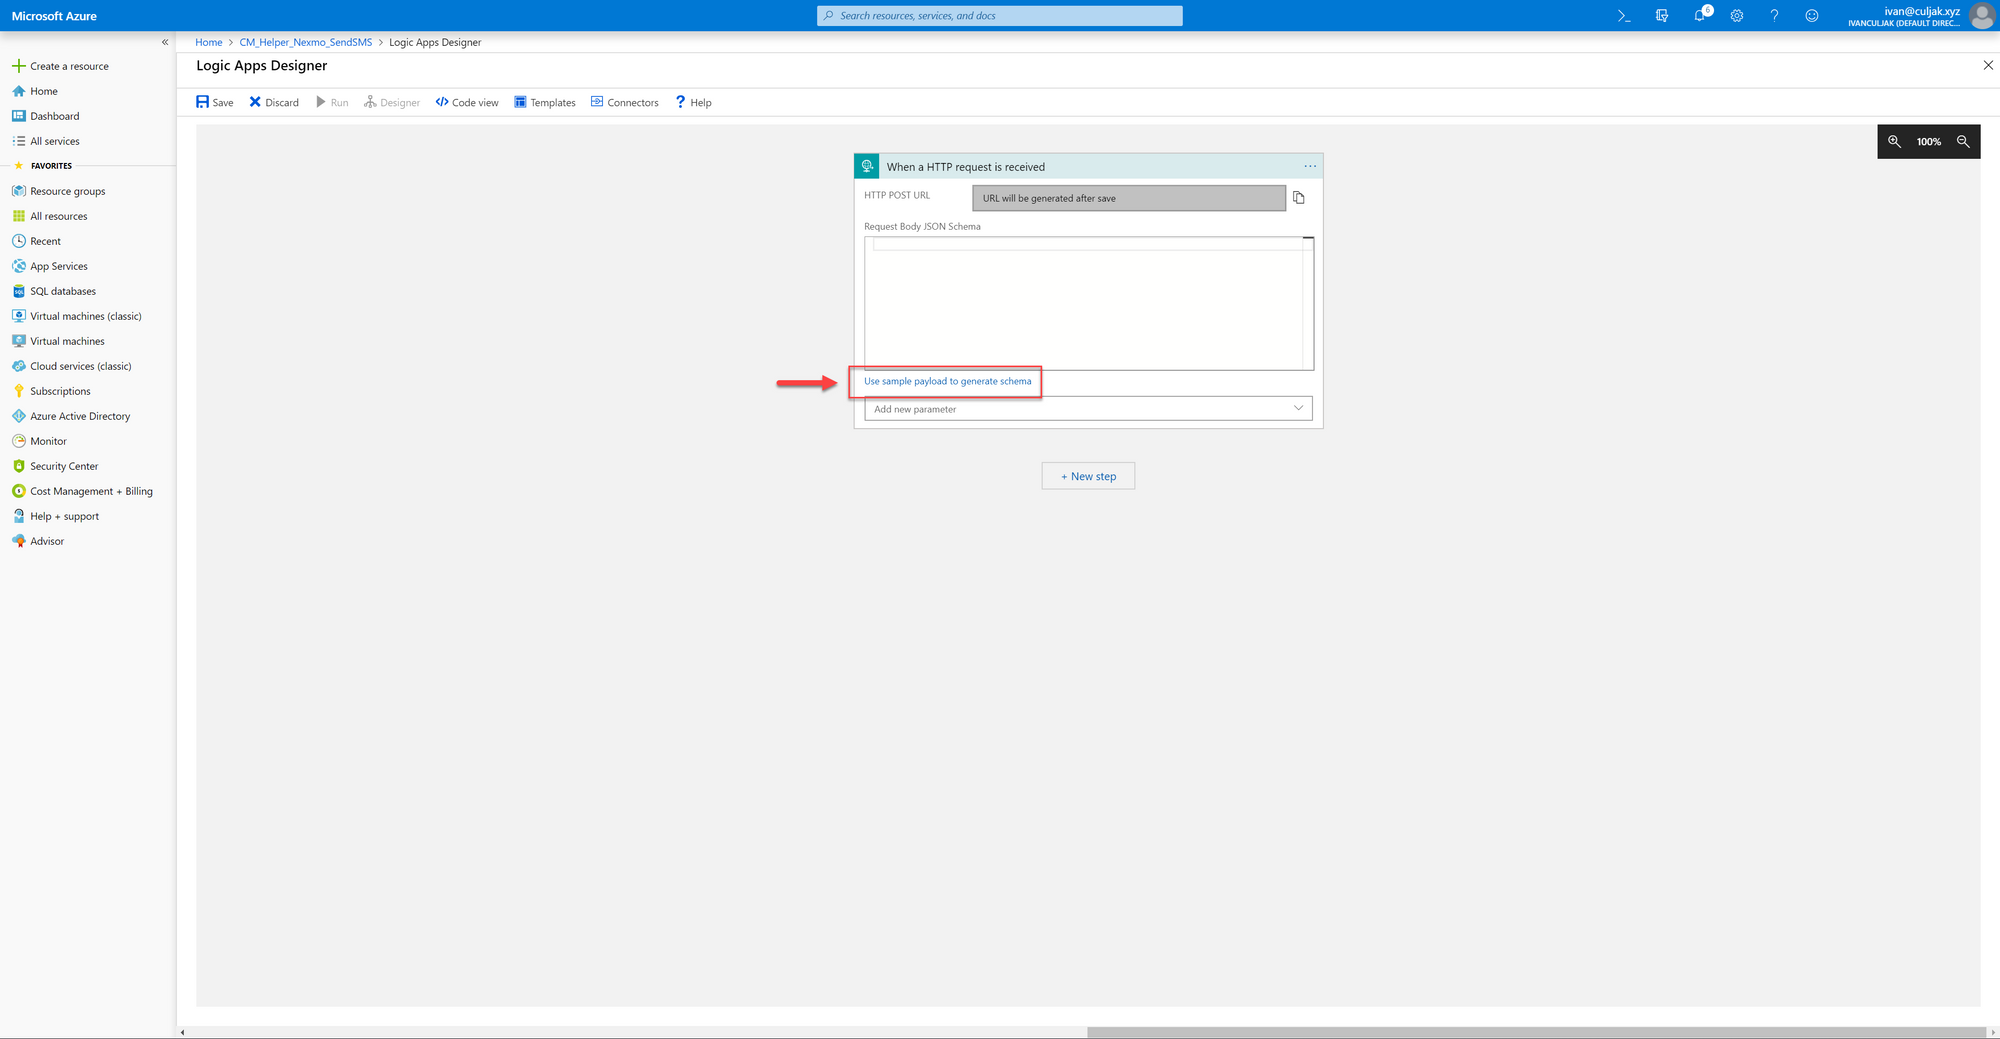
You'll end up with a screen where you can enter the JSON Schema, but I'm not a fan of typing that manually. Instead, we're going to copy-paste a sample JSON payload and have Logic Apps Designer generate the schema. To do that, click on the "Use sample payload to generate schema" link.

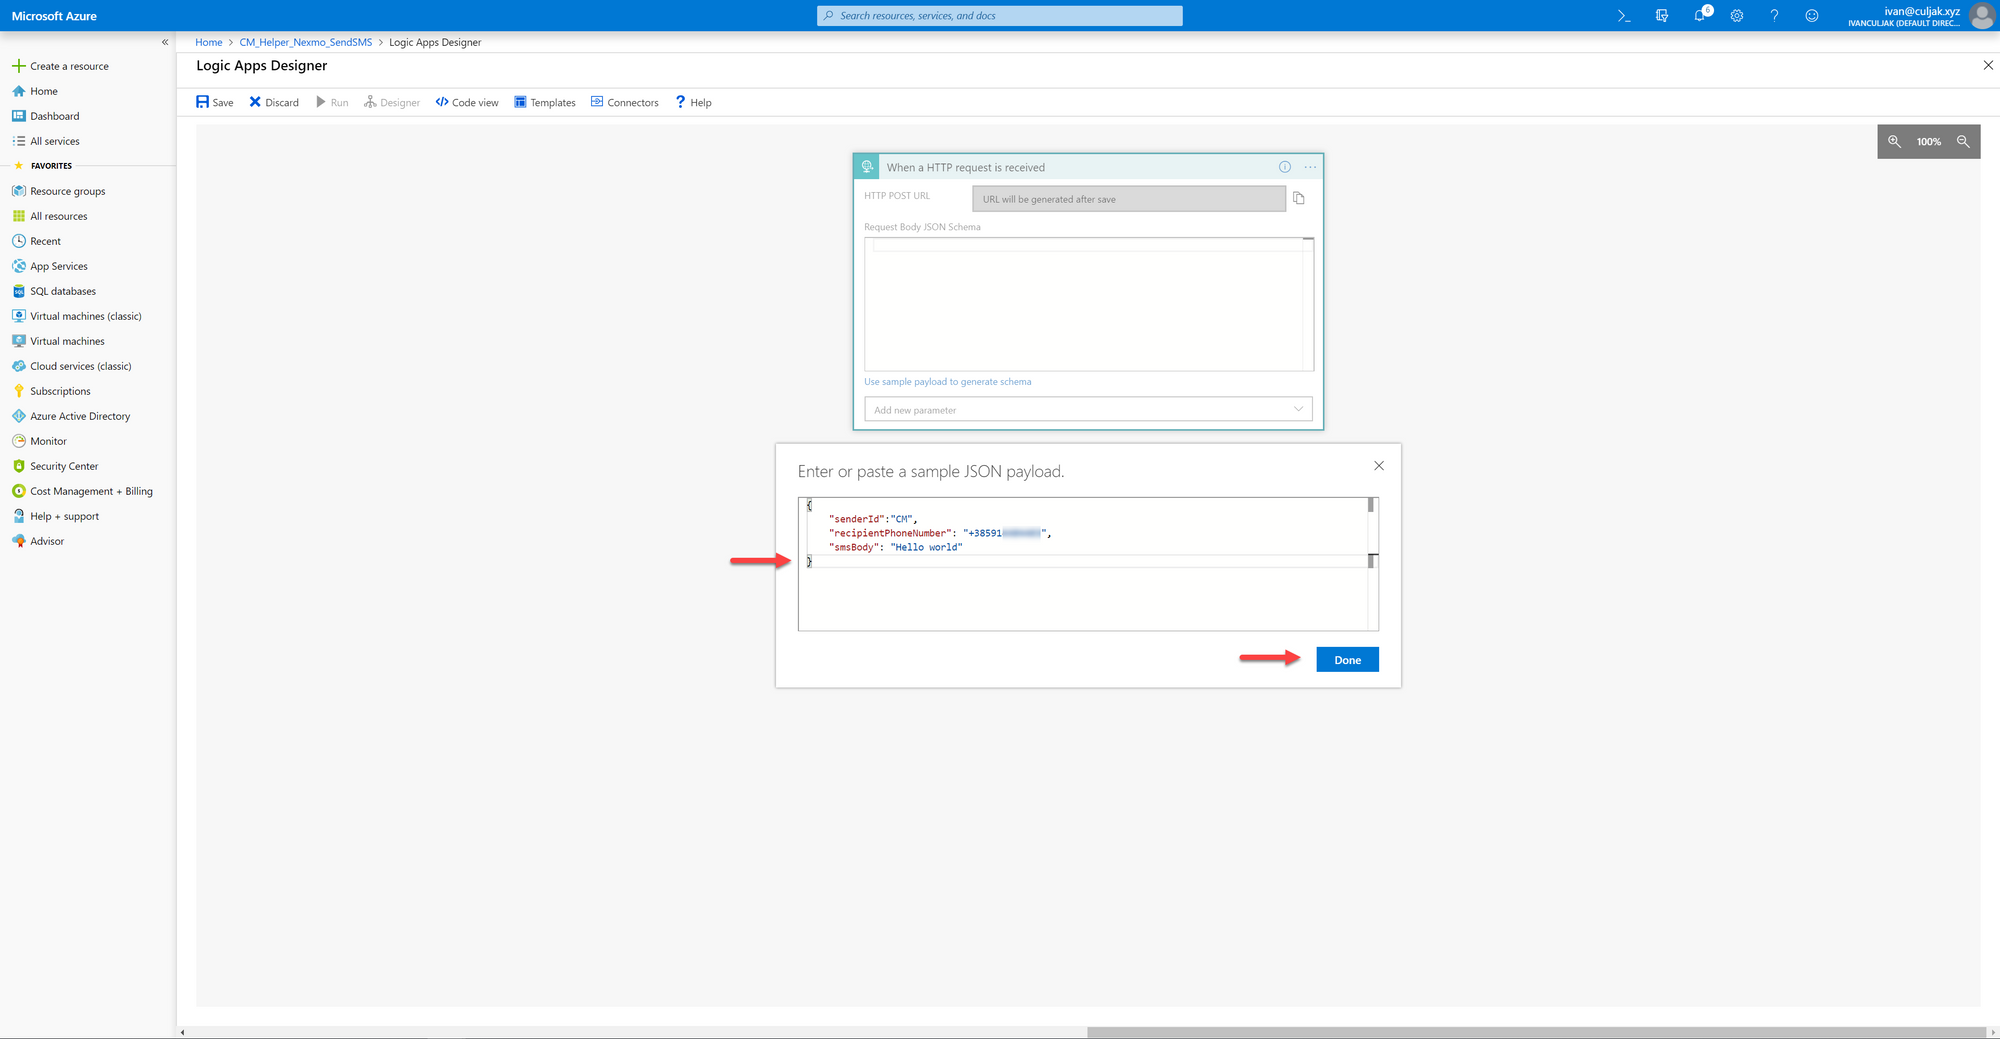
A new "window" will appear, and the only thing you need to do is paste the JSON payload sample there, and click "Done"

Here's the JSON sample payload that I've pasted there:
{
	"senderId":"CM",
	"recipientPhoneNumber": "+385912345678",
	"smsBody": "Hello world"
}
The JSON sample payload is the only "variable" part of this blog post - you'll need to paste a sample there that suits your case.
After you've clicked "Done", the "Request Body JSON Schema" field will be populated with everything needed to deserialize the JSON from the request body.
You'll be able to access all those deserialized properties/fields/variables (however you prefer calling them) in the steps that you'll be adding.
